When a doctor utters the words, “It’s cancer,” time seems to stop. In my over ten years of working closely with clinical oncology teams and communicating medical research, I have sat in consultation rooms during these heavy, silent moments more times than I can count. The immediate emotion is almost always overwhelming fear, quickly followed by a paralyzing flood of information.
A decade ago, the conversation around cancer care was starkly limited: surgery, chemotherapy, or radiation. Today, the landscape looks fundamentally different. We are witnessing a historic transformation where oncology is shifting from a blunt force approach to surgical precision down to the cellular level. Understanding your cancer treatment options is no longer just about knowing what drugs exist; it is about knowing how modern medicine can tailor therapies specifically to your body’s unique genetic code.
Beyond the Big Three: Understanding Modern Cancer Care
For decades, the standard protocol relied on what clinicians affectionately call the “three pillars” of oncology: surgical resection, systemic chemotherapy, and targeted radiation therapy. While these remain critical tools, the way we deploy them has evolved dramatically.
Chemotherapy, for instance, has long carried a reputation for severe toxicity. Traditional cytotoxic drugs work like a carpet bomb—they attack any rapidly dividing cell in the body, which includes cancer cells, but also hair follicles, stomach lining, and bone marrow. Modern protocols, however, increasingly lean on precision administration and protective agents to mitigate these systemic side effects.
To help visualize how the medical community categorizes current options, consider this breakdown:
| Treatment Category | Primary Mechanism | Best Suited For | Key Advantage |
| Traditional Surgery | Physical removal of tumor tissue | Solid, localized tumors | Immediate reduction of tumor burden |
| Targeted Therapy | Blocks specific mutated proteins | Tumors with actionable biomarkers | Minimal harm to surrounding healthy tissue |
| Immunotherapy | Re-educates host immune system | Systemic or metastasized cancers | Long-lasting immune memory & durable response |
| Precision Radiation | High-energy ray DNA destruction | Inoperable or localized masses | High spatial accuracy (e.g., Proton Therapy) |
The Frontiers of Precision Medicine: Target, Train, and Edit
The most thrilling developments I have covered over the last few years center around empowering the body’s internal defenses and targeting specific genetic glitches.
1. Immunotherapy: Training Your Immune Army
Your immune system is naturally equipped with natural killer (NK) cells and T-cells designed to destroy abnormal growth. However, cancer cells are master manipulators. They express specific surface proteins—like PD-L1—that act like a “fake ID card,” tricking immune checkpoints into ignoring them.
Checkpoint Inhibitors act like security guards who strip away these fake IDs, allowing your immune system to recognize and eliminate malignant cells.
Another breakthrough is CAR T-Cell Therapy. In this process, clinicians extract a patient’s T-cells, genetically re-engineer them in a lab with specific receptors, and infuse them back into the body. Think of it like taking standard police officers, giving them thermal vision goggles and specialized equipment, and returning them to the field to hunt down a specific target.
2. Targeted Therapy: Lock-and-Key Precision
If traditional chemotherapy is a carpet bomb, targeted therapy is a guided sniper rifle. These medications work by identifying specific genetic mutations—such as EGFR, ALK, or HER2—that tell cancer cells to divide uncontrollably.
By blocking these signal pathways, targeted drugs starve the tumor of growth signals without causing the widespread destruction associated with older modalities.
3. Precision Radiation and Proton Beam Therapy
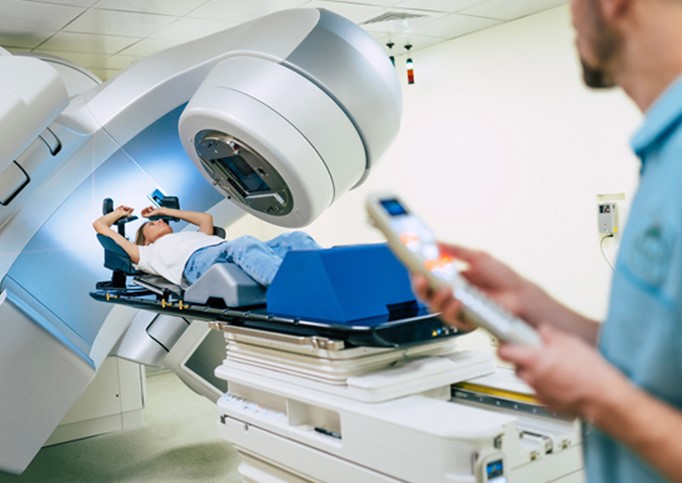
Radiation therapy is no longer an imprecise beam. Technologies like Proton Beam Therapy utilize heavy, positively charged particles that stop precisely at the tumor site (a phenomenon known as the Bragg Peak). This prevents “exit dose” radiation from damaging delicate surrounding tissue, such as healthy heart or brain tissue.
Navigating Precision Biomarker Testing
One major insight I always emphasize to patients and families is this: two people with the exact same stage of lung cancer may require completely different treatment plans.
This is where biomarker testing (or Next-Generation Sequencing) becomes non-negotiable.
[ Tumor Biopsy / Liquid Biopsy ] ➔ [ Next-Generation Sequencing (NGS) ] ➔ [ Identification of Driver Mutations ] ➔ [ Customized Targeted/Immunotherapy Plan ]
Biomarker testing scans the DNA and proteins of a tumor to create a molecular fingerprint. Without this test, choosing a treatment strategy is like trying to unlock a custom door with a random master key.
-
Genomic Profiling: Identifies DNA mutations within the tumor cells.
-
Liquid Biopsies: A simple blood draw that detects circulating tumor DNA (ctDNA) without needing invasive tissue samples.
-
Companion Diagnostics: Tests designed specifically to determine if a patient will respond to a particular targeted medication.
Expert Advice: Pro Tips & Hidden Pitfalls
PRO TIP: Always Request a Multidisciplinary Tumor Board ReviewNever rely on the opinion of a single clinician alone. The best cancer care happens when a tumor board—a collaborative team consisting of surgical oncologists, medical oncologists, radiation oncologists, pathologists, and geneticists—reviews your case together. Ask your primary care team if your treatment plan has been evaluated by a multidisciplinary board.
Hidden Pitfalls to Avoid:
-
Rushing into Treatment Without Biomarker Results: Unless your condition requires immediate emergency intervention, waiting a few weeks for comprehensive genomic sequencing results can prevent you from starting a less effective therapy first.
-
Ignoring Clinical Trials as an Early Option: Clinical trials are often misunderstood as a “last resort.” In reality, Phase II and Phase III trials frequently offer early access to cutting-edge therapies years before they become widely available standard-of-care treatments.
-
Underestimating Integrative Palliative Care: Palliative care is not hospice care. Involving palliative specialists early in your treatment helps manage side effects, pain, and psychological stress, which directly improves your ability to stay on your primary cancer treatment schedule.
Empowering Your Path Forward
Navigating the landscape of modern cancer treatment options can feel daunting, but you do not have to walk this path without guidance. Medicine has moved away from one-size-fits-all solutions toward highly personalized strategies designed to offer maximum efficacy with optimal quality of life.
The most critical step you can take today is advocating for your own care: ask questions, demand molecular testing, seek second opinions, and leverage multidisciplinary expertise.
Are you or a loved one currently navigating treatment decisions? What questions do you have about biomarker testing or novel therapies? Share your thoughts or questions in the comments below—let’s keep this vital conversation going!